Installing a smart locker means setting up an automated, autonomous point of sale designed to sell your products through short supply chains. To successfully launch your smart locker project in Quebec, you need to anticipate needs, location, logistics, and software configuration. In this article, discover all the steps to install a connected vending solution, from defining your needs to commercial launch.
⚡✅ In brief: Checklist for installing your smart locker
- Define your products and volumes;
- Choose a visible and accessible location;
- Check connections (electricity, network);
- Secure the installation area;
- Plan your launch communication;
- Complete Kiosk training;
- Adjust your offer after launch.
Step 1: Clearly define your needs before installing a smart locker 🧾✏️
More than 600 clients have already installed a smart locker with Automat-e. And every time, our team has been there to support them.
Before installing your automated food vending solution in Canada, our sales team helps you define and structure your project from A to Z. They are there to clarify usage, estimate expected volume, and choose the lockers best suited to your needs: 15, 21, 24, or 28 locker modules, or Compact 10 / 14 depending on your requirements. Each project is unique, and our teams adapt to your context to build a truly customized solution.
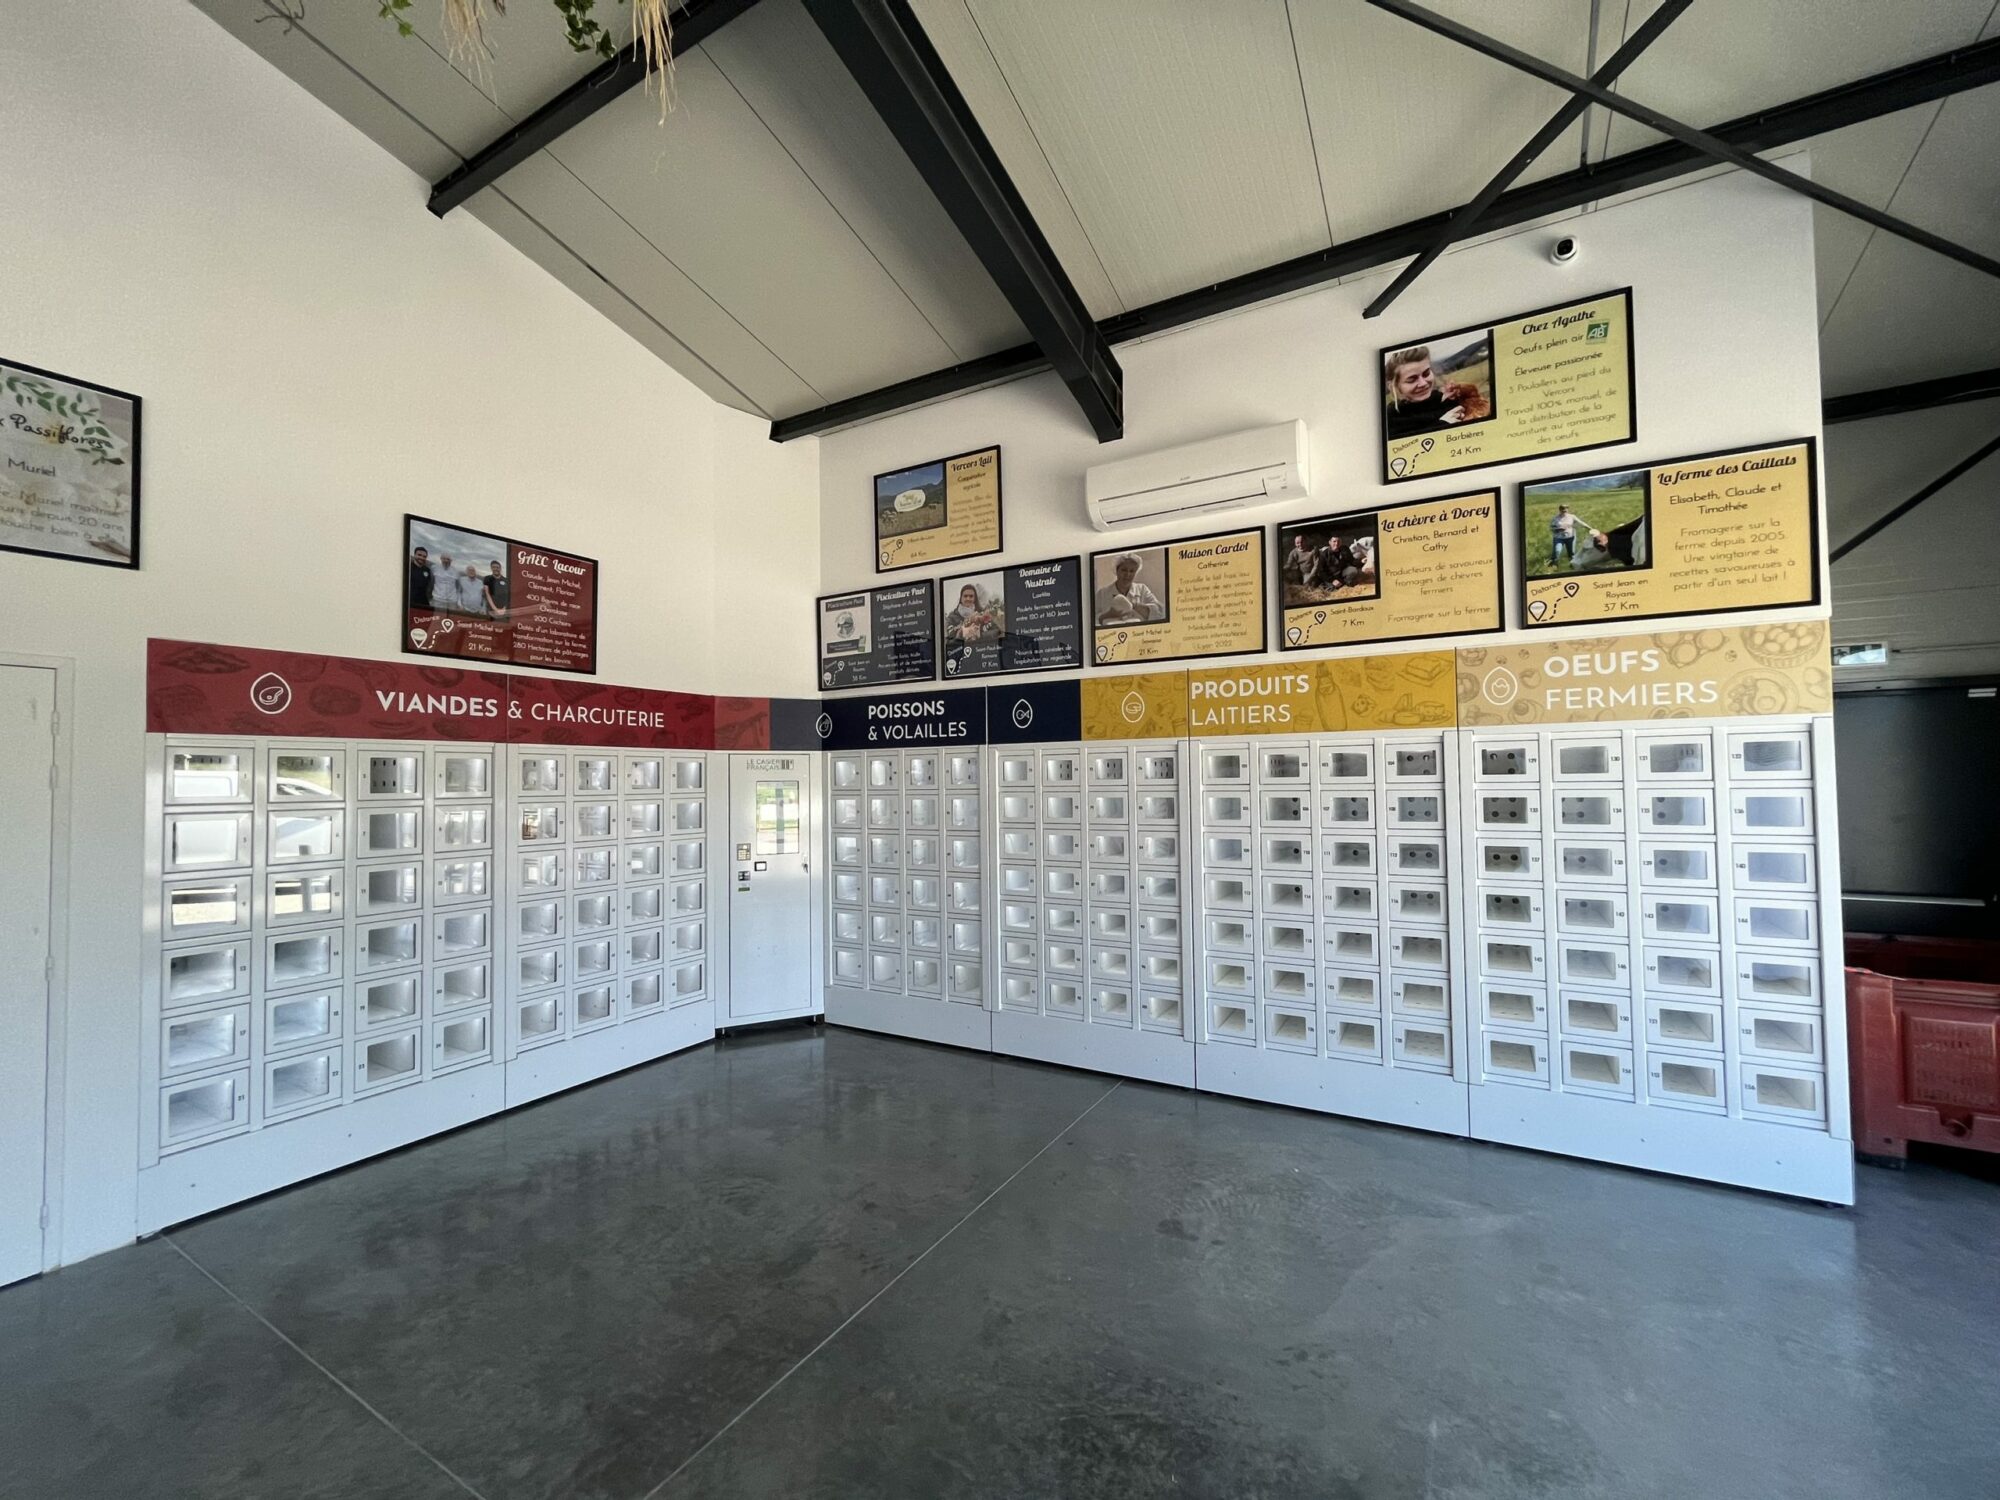
At this stage, you can also choose the customization of your smart lockers for local products. Our marketing team listens to your ideas to create a visual identity in your brand colors, helping your customers quickly recognize your lockers.
Step 2: Find the ideal location to install your smart locker 📍
Choosing the right location is a key step in your self-service point-of-sale project, as it directly impacts usage and performance.
The goal is to make your vending machine visible and accessible to everyone. To achieve this, choose a high-traffic area with smooth circulation. Also anticipate practical usage: pedestrian access, parking, etc.
Finally, think about user comfort: a well-lit, clearly signposted location, sheltered if possible, and close enough to your activity to make restocking and daily supervision easier.
Step 3: Installing a smart locker requires preparation: access, delivery, and logistics 🚚
To ensure smooth installation, plan all site logistics in advance. This step also helps verify essential requirements for proper operation: nearby electrical supply, stable network connection if needed, and good 4G/Wi-Fi coverage in the area.
By addressing these points beforehand, you avoid surprises and ensure faster installation.
Step 4: Secure the smart locker location 🔒
Securing a smart locker starts with a suitable environment: a clean, stable, and sufficiently open area to allow door opening and user circulation.
Depending on whether it’s installed indoors or outdoors, you must also anticipate protection constraints (rain, sun, temperature variations, lighting) to ensure smooth operation.
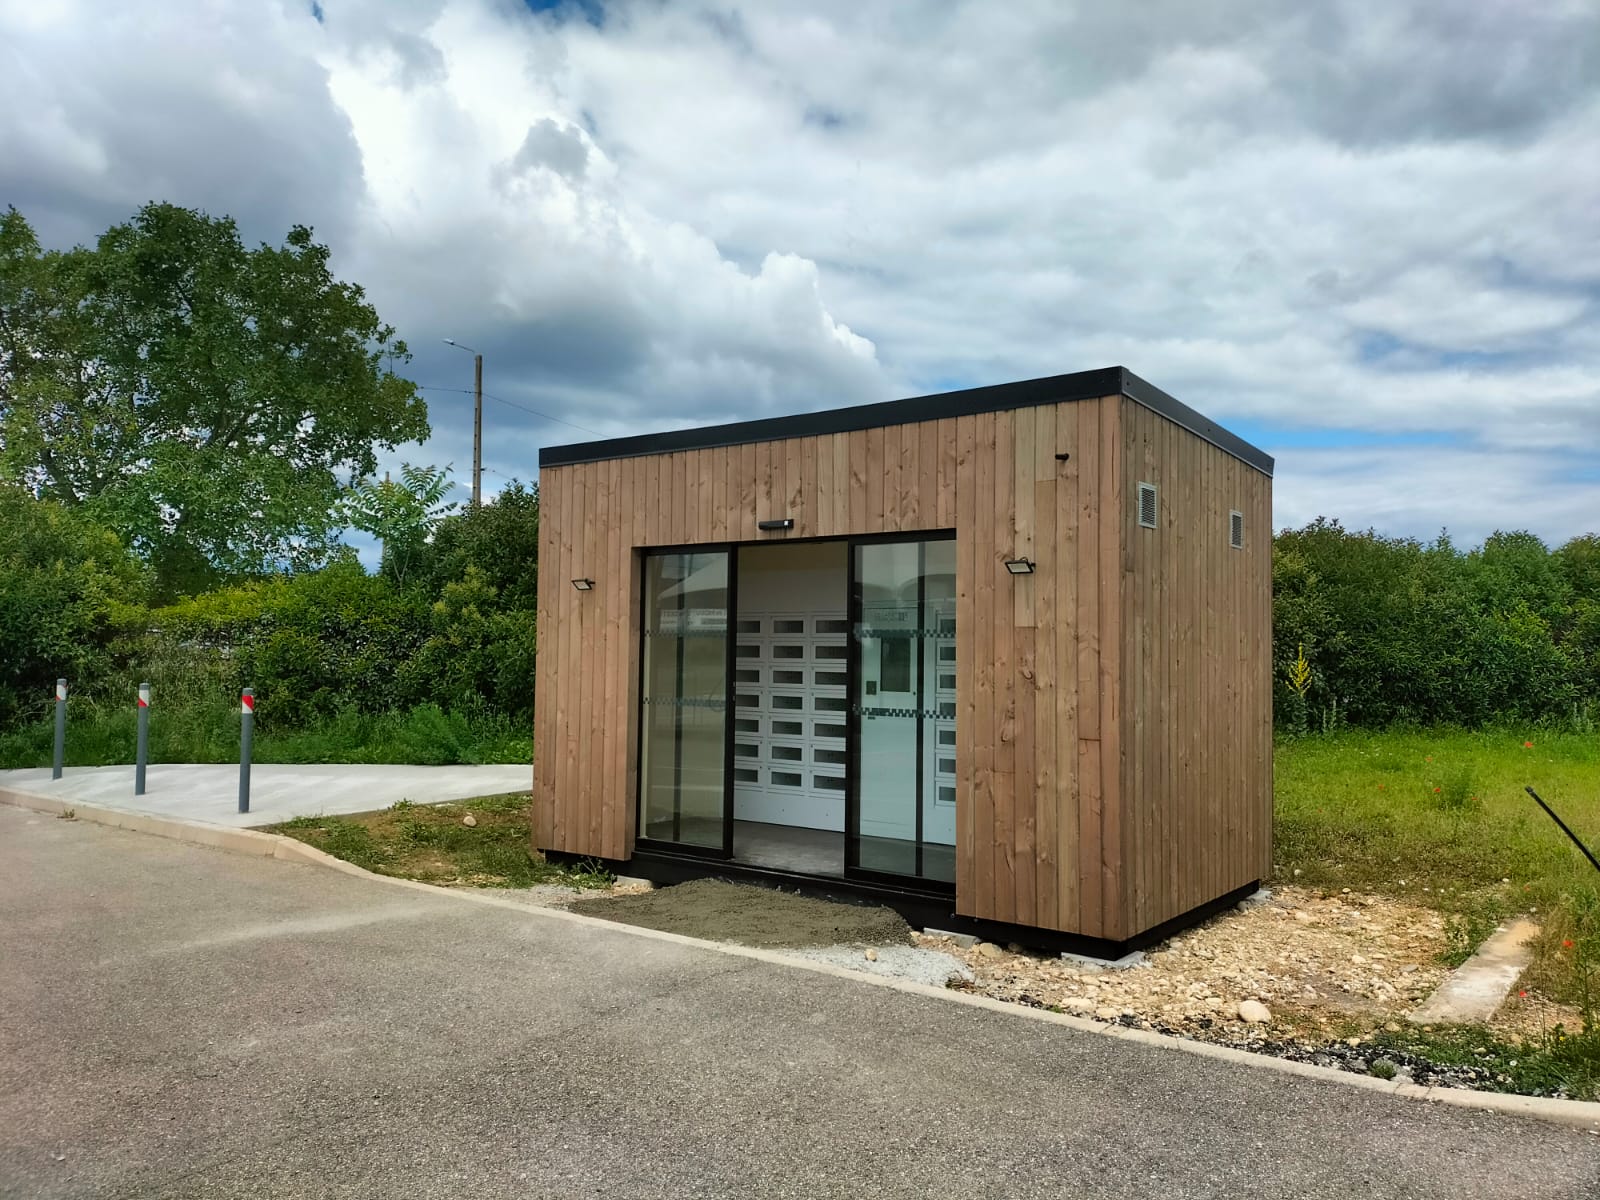
For outdoor installations, we offer modular buildings in wood or metal, designed to protect lockers from weather conditions and secure the area.
Since you are managing a staff-free sales solution, you can also implement your own video surveillance system to secure the installation. This reassures both you and your customers while discouraging malicious behavior.
Step 5: Installing a smart locker: our teams take care of it 🛠️
On installation day, our technicians take over and handle the setup of your short supply chain vending solution in Canada. We manage delivery and transport of the smart locker to its final location.
The modules are then assembled and adjusted according to the chosen configuration, and our teams ensure all necessary fixings for long-term stability and safety. They also install refrigeration units for chilled lockers.
The goal: a solid, clean installation ready for quick commissioning.
Step 6: Installing a smart locker: setup and configuration 💻
Once the vending machine is installed, it’s time for software commissioning.
The smart locker setup is carried out by our technicians to adapt the solution to your operations: your user accounts and access rights are created and configured so you can start using the system as quickly as possible.
Result: a ready-to-use locker with a coherent, secure, and easy-to-manage configuration.

Step 7: Kiosk training to manage your smart locker 📊
Now comes the software configuration: the Kiosk. To improve efficiency and while waiting for your automated store delivery, you receive remote training with our sales assistant.
The goal: make you fully autonomous in managing your smart locker through our management solution. This software, designed and developed by Automat-e engineers, allows daily remote management of your lockers.
During this session, you learn how to set up your products, organize your catalog, adjust your content (images, prices, information), and understand key features.
You also discover real-time sales tracking: fill rates, activity, and useful indicators to anticipate restocking.
Result: a clear, guided onboarding, directly applicable from the moment your vending solution goes live, giving you full control over your automated customer experience.
Step 8: Installing a smart locker and successfully launching your sales 🚀
The launch phase is crucial: you need to encourage usage from the very first days.
To get started successfully, we recommend preparing simple and consistent communication in advance through local newspapers and social media. Don’t hesitate to rely on word of mouth—it works very well.
Also focus on on-site visibility: signage, displays, and directions from the entrance or parking area.
An opening event for your new 24/7 local business can make a real difference (demonstrations, launch offers, promotion through your network, partners, or neighboring businesses).
Finally, the first weeks are for adjustments: observe which products sell best, adapt your catalog, monitor stock levels, listen to customer feedback, and establish a restocking routine.
With these best practices, your fresh product locker quickly becomes a strong sales channel and a valued customer touchpoint.
Do you have an idea or a smart locker project? Contact our team and let’s start building it together.
❔FAQ – Everything you need to know about installing a smart locker
🔹How long does it take to install a smart locker?
On average, allow between 10 and 12 weeks from order to full installation.
🔹Can a locker operate without electricity?
No, it requires a power supply as well as good network or Wi-Fi coverage.
🔹Is the locker accessible 24/7?
Yes. Once installed, the smart locker operates autonomously 24/7. You can choose to restrict these hours if needed.
🔹What types of products can be sold?
You can sell food products (bread, meat, fish, cheese, etc.) or non-food items, including dry, fresh, or frozen products depending on your vending machine configuration.